10/4/14

Happy Hauntings

Welcome to the Jacksonville STARZ Blog Hop. This month our theme is Halloween.  Pinterest is just booming with ideas for Halloween, which led me to create these "Pinspired" projects.

The card is "Pinspired" by Lynn Pratt & Karen Morris. I really love how the tombstones turned out. I changed Lynn's original card by changing the coloration and making the tombstone haunted by a ghost instead of a bat. I used Karen's technique to create the bats using the Butterfly punches.


For instructions on how to recreate this card Click Here

Product List
****************************************

These cute little Monster Treat Boxes are "Pinspired" by Debbie Henderson. I must admit that I had no intention of purchasing the Curvy Keepsake thinlit, but after seeing the creative things that Debbie did with it, I couldn't resist. Even my husband loves these little guys!!!


I used the 3/4" circle punch for the eyes and eyelids.

Frankenstein's nose is the scrap left over from the handle of the Curvy Keepsake Box. His pupils are made from the 1/2" Circle Punch. I created his hair using the Large Oval punch with little triangles cut out of it. I finished up his mouth and stitches with a Black Stamp'n Write Marker.

Dracula's teeth are the tips of the Pennant Punch, and his nose and pupils are from the owl punch (since I still had it out from making the card). I cut a scrap piece of Basic Black with the Curvy Keepsake thinlit, and then I used a 1" circle punch to shape his widow's peak. I finished\up by giving him bloodshot eyes and bloody fangs with a Real Red Stamp'n Write marker. I can't wait to make more creatures!

I hope you enjoyed these "Pinspired" projects. Now make sure you click the next button, so you can check out Amy's awesome creation!!!


If you missed any of the other Jacksonville STARZ fabulous crafts, please make sure you check them out.
Amanda Sevall
Priscilla Thoreson
Maria Willis
Amy Unick
Lee Conrey
Susan Best

10/1/14

Stamp, Stock, & Save

For those of you who do not know, October 4th is "World Card Making Day", and Stampin' Up! is so excited about it, that we're having a ridiculous 15% off sale on some of your favorite products! From October 1-6 , you'll be able to purchase select ink, paper, envelops, and adhesive-all at a 15% discount! Select stamps are 20%!

To top off the savings, I will be offering additional free shipping on orders of $50 or more placed at my World Card Making Day Event on October 4th! 

Click HERE to see a PDF of all the great deals!
  • Deadline is Monday, October 6, 2014; 11:50 PM (MT)

9/5/14

New Snowflake Card Thinlit

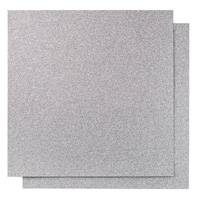
I spent my Labor Day weekend making cards with the Southern Hot Scrappers. My Winter Letterpress Stamp set was on backorder and came in the mail last Saturday, so Sunday was spent creating this card (and a few others). I'm loving the silver glimmer paper paired with the Encore Ink.


This card is pretty simple to make. For printable instructions click HERE.

Product List

Here is one more picture of the card. The snowflake is pretty big, so you can put a nice sized greeting on the inside.


The Winter Letterpress Stamp set pairs up nicely with the Snowflake Card Thinlits. I was disappointed that there is not a die that fits the large snowflake. However, Stampin' Up! has a great YouTube video to circumvent this issue.


Don't forget to pin this post and leave a comment or question!

8/31/14

STARZ Holiday Blog Hop

The Jacksonville STARZ are celebrating the release of the the new Stampin' Up! Holiday Catalog with a Blog Hop. If you didn't hop over here from Rose Ann's Blog, then make sure you check her post along with all the other STARZ.

My design uses the Bright and Beautiful Stamp Set along with the Stars Framelits.


Click Print Recipe for a printer friendly version.

Product List


Instructions:
  1. Punch the Confetti Stars out of the bottom edge of the Island Indigo. 
  2. Emboss the top portion of the Island Indigo with the Lucky Stars Embossing Folder.
  3. Adhere the Washi tape just above the Confetti Stars.
  4. Using Dimensionals, adhere the Island Indigo piece to the card face.
  5. Using the Silver Encore Inck, stamp the largest star image onto the Lost Lagoon, then cut the image out using the 2nd largest Stars Framelit.
  6. Cut the 3 stars out of the Glimmer paper in one pass, by nesting the 2nd largest and the 2 smallest Star Framelits.
  7. Adhere the large Glimmer star using Tombo Multipurpose glue. Then build the rest of the star using Dimensionals.

Thank you for visiting. After you leave a comment, make sure you hop on over to Priscilla's Blog and check out her Holiday card.

8/3/14

Stampin' Up has got an awesome deal right now. Buy a Big Shot and get a Stamp set with its matching framelits free. If you already own a Big Shot, then you can still buy the bundles at a 15% discount. These Bundles are special and will only be available until August 31st, so get them before they are gone. 
* Also available in wood mount.
** Some stamps are also available in Spanish or French.

8/2/14

Maritime Shaker


Well, it's been a while since I posted. Sorry, there's really no excuse. Just plain laziness. As summer vacation is coming to an end soon, I figured I should try to get into the habit of posting more often. I'd like to do it at least once a week, but we shall SEA.. SEA what I did there? Speaking of SEA, I demonstrated how to make this card last month in one of my card classes. I really liked how it turned out. For instructions on how to complete this card yourself Click  Print Recipe. Have fun and enjoy!

Product List

4/10/14

Owl Card

I mentor a new teacher at my school, and she just celebrated her birthday this past week. She is really into owls, and I seen this design on Pinterest from addINKtive designs a couple of months ago. I just love the way it turned out. Once I had all the supplies together, it only took me about 20 minutes to put the whole thing together. Click the link below to get the recipe to make this adorable card. 


Click here to Print Instructions

Product List