5/29/15

Bohemian Rhapsody

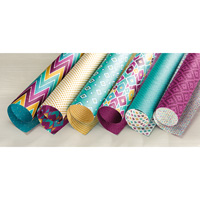
I thought you might like a sneak peak into the new Stampin' Up Catalog. This card uses the new Bohemian Designer Series Paper, which I absolutely LOVE! I actually only used two sheet from the set, but I assure you that ALL the designs in this set are amazing!!!

The background from the first card is the reverse side of the Bermuda Bay Pennant, and the background from the second card is the reverse side of the the Rich Razzleberry Pennant.


The Bohemian DSP coordinates with Bermuda Bay, Blackberry Bliss, Island Indigo, Delightful Dijon, Rich Razzleberry, and Very Vanilla. You can also purchase a pack of Bohemian Cardstock, which includes 8 sheets of each color: Bermuda Bay, Delightful Dijon, and Rich Razzleberry. I also used the new Banner Triple Punch to create the pennants. All of these new products will be available for purchase on June 2nd. 


Measurements:
Very Vanilla: Card base is 4-1/4 x 11 scored at 5-1/2"
                             Greeting is 2"
Rich Razzleberry: 4 x 5-1/4"
* I punched the 2" circle out of the middle of the mat.
Bermuda Bay: 2-1/2" square
Delightful Dijon: 2-1/2" square
DSP: Backgroud is 3-3/4 x 5"
            Pennants are 1 x 5"


Product List

5/28/15

Mixed Media Makeover

So my goal of posting once a week has yet to be met. I've been really busy this past month with the end of the school year stuff. However, I have taken some time to craft. May 15th - 17th I attended my monthly Scrapbooking Retreat. I participated in a challenge, and won 3rd place! The challenge was to alter this awful looking planner into some awesome! 


The ladies that put on this Scrapbook Retreat stated that they got these UGLY things from the $1.50 bins at Michaels, and believe it or not the inside of the planner is very nice. It has a grey and white chevron design, and there is a sturdy pocket for each month.  

I've been watching many Mixed Media Videos on YouTube lately, so I thought I take the opportunity to get my hands wet. First I put a lite coating of Gesso all over the planner. Then I used a variety of stencils (Tim Holtz & TCW) and modeling paste to add some texture. Next, I used different spray inks (Tattered Angles & Dylusions). After it was all dry, I went over the textured pieces with some antiqued gold Rub 'n Buff. I added some Prima Flowers and some metal pieces. The binding looked a little plain, so I added some black acrylic paint with my finger. Here is the finished product:


I'm really happy with how my first Mixed Media project turned out. I can't wait to do more!!!


5/2/15

Jax STARZ Hop - Dads & Grads

Welcome to May's installment of the the Jacksonville STARZ Hop. You may just be starting the blog hop or may have come from Beka's Blog. Either way welcome! You can follow the full blog hop lineup below to move along from blog to blog, so you can see all of the new projects. This month we are focusing on Dads and Grads. I chose to focus on the Grads because 1) I am a high school teacher, and 2) I have about 5 seniors that are graduating this year.

Here is the card I'm making for my seniors that are graduating this year. My school's colors are Black and Gold, so I used Basic Black and Crushed Curry. It's a very simple yet elegant, and I think my graduates will love it. I think I might add a diploma and 2015 to the base of the year. 


 It's a Spring Fold Card. Basically the fold of the card springs up the face of the card. Here is a template to help you recreate this card.


The dotted lines are where you score, and the solid lines are where you cut. Here is a picutre to show how the fold works. Once your are finished embellishing your card you glue the bottom triangle to the base. This helps the face of the card "spring" up. 


Well thanks for hopping by. Please be sure to leave a comment before you head on over to Rose Ann's Blog

Blog Roll:
Amanda Sevall
Amy Unick 
Beka Laing
Cari Verschueren - You Are Here!!!
Rose Ann Marr


Product List