9/5/15

Fall into the Jax STARZ blog hop!

Welcome to September's installment of the Jacksonville STARZ Hop. You may just be starting the blog hop or may have come from Amanda's Blog. Either way welcome! You can follow the full blog hop lineup below to move along from blog to blog, so you can see all of the new projects. This month we are focusing on Autumn. I am originally from Michigan, which is beautiful in the fall. I love how the Sugar Maple’s leaves change colors. I thought I'd try bringing that to life with this card, which is pinspired.

Measurements are:
Cajun Craze  5.5 x 8.5" scored @ 4.25" & 1.75 X 5.25"
Whisper White 5.25 x 4" & 1.5 x 5.25


Place the smaller piece of whisper white onto the bigger piece. You may want to use a little bit of snail adhesive to hold it in place while stamping. Just a tiny bit because you will remove it later. Stamp the image as shown. Don't worry about the parts close to the edges of the smaller piece as the small piece of Cajun Craze will cover those in the end. 

Next remove the small piece of Whisper White, and mat it with the small piece of Cajun Craze cardstock. Then pop it up with Stampin' Dimensionals onto the large piece of Whisper White. If yo line up the top and bottom edges, the image should also line up.

Ink the "Thankful" part of the "Thankful for You" sentiment, and stamp it in the upper right hand corner. I wanted to put my rhine stones up there too, but I forgot to leave room. I just put them down on the bottom right. In case you were wondering, I used my Cajun Craze Stampin' Write marker to color my Rhinestones. 

I hope you all like my card. Thanks for hopping by. Please be sure to leave a comment before you head over to Maria's Blog


Product List

6/15/15

Breaking the Rules: Cottage Greetings

I am in love with the new kits that Stampin' Up is offering. Today I've been playing around with the Cottage Greeting kit. It comes with enough supplies to make 15 card (5 of each design).

Cottage Greeting Kit
 After I made one of each card, I decided to get a little creative and "break the rules" and turned the card kit into a two page scrapbook layout. I wish Stampin' Up would make full 12 x 12 or even 8-1/2 x 11" sheet of these card bases. They are gorgeous!

Side by Side
Believe it or not I only use 4 cards to create this page, and I have little scraps that I could use to make banners with! I haven't added any embellishments YET...

Here are some larger pictures.

1st Page
The squares are various sizes, that will fit photos ranging from 4" to 4-3/4" squares. The large photo mat will fit a 4x6" photo.

2nd page
In my next class we will be using the Cottage Greeting Kit and Stamp Set to create one of each card and a two page layout. Leave a comment if you would like to join us.

Product List:

6/6/15

Bohemian Hop

Welcome to this month's Jacksonville Starz Blog Hop. You may be just starting the hop or you have hopped over from Beka's Blog. Either way, Welcome! This month we have a sketch challenge designed by Amanda.


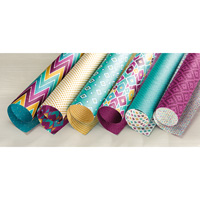
As I mentioned in an earlier post, I just love the new Bohemian Designer Series Paper that is now available at my online store! I used the scraps left over from that previous card to create this card.

I must apologize for the bad pictures. I must have taken a half a dozen pictures and had a terrible time getting the camera to focus. I think it is because of the big flower and bad lighting. I used the Celebrate Today stamp set for the greeting. I like the effect that the 2 different colors in the greeting add to the card, and this stamp set make it easy to do because each word is a separate stamp.

I created the big flower with layering different colored paper (Bermuda Bay, Rich Razzleberry, Bohemian DSP, Delightful Dijon) I curled each layer with my bone folder.


Well, thank you for joining the hop this month. Please don't forget to leave a comment before you hop on over to Maria's Blog.

Just in case you missed any of the other Jacksonville Staz Blog, here is the full line up:

Amanda Sevall

Beka Laing 
Cari Verschueren - You are Here!
Maria Willis

Rose Ann Marr


Product List
130698s
[130698]
$15.95

6/1/15

ATC: 4 Elements

Recently I've hosted a 4 part series of ATC swaps on the 4 Elements - Earth, Wind, Water, & Fire. I thought I'd share some of the ATC's that I made for this swap. In case you do not know what ATC's are, they are Artist Trading Cards. ATC's have been around a really long time. In fact, they are credited as the first Business Cards. Back in the 1800's artists would give out small samples of their work with their contact information on the back, in the hopes of employment. It became somewhat popular in the craft world in 1997 in Switzerland and even more so now-a-days all over the world. ATC's have only one requirement, and that is their measurement must be 2-1/2 x 3-1/2". Other than that, anything goes.

The first ATC in my series was Earth. Earth makes me think of dirt and metal, so that was my inspiration for this ATC. First I tore out the "earth" page from an old dictionary, which is designated for crafting purposes. I crumpled up the paper and distressed the creases with ink. Next, I  used a die to cut out the gears. Sorry, I can't remember the brand of the die, it wasn't a popular brand. I got it from a local specialty store called "A Small Cleverness". I cut the gears out from the die, and placed each pieces where I wanted them. The center of the gears are some stickers I found at JoAnn's. Then I used some epoxy alphabet stickers to spell out "earth".  Last, I used some Walnut Distress Paint and "muddied" up the edges.


The Second in the series was Wind, but I completely and totally forgot to take a picture of that ATC. :(

The third was Water. First, I sponged watercolor paper with some Pool Party and Bermuda Bay ink. Then I stamped one of the images from the Water Effects 2 set by Designs by Ryn, using Pacific Point ink. I used a White Jelly Roll pen to accentuate the lighting. And last, I used Crystal Effects to give it the wet look. 


The last in the series was Fire. I am in no way trained in the art of drawing! I had to do some research on how to draw flames before even attempting to draw this. Either way, I'm rather pleased at how this turned out. After drawing the flames on watercolor paper with pencil, I outlined using my Copic Multi-liner. Then I colored in the flames using my copics R27, YR04, Y13, and I can't remember the lightest color. Last, I went over the flames with Crystal Effects. I'm addicted to this stuff!!! I should have used some


5/29/15

Bohemian Rhapsody

I thought you might like a sneak peak into the new Stampin' Up Catalog. This card uses the new Bohemian Designer Series Paper, which I absolutely LOVE! I actually only used two sheet from the set, but I assure you that ALL the designs in this set are amazing!!!

The background from the first card is the reverse side of the Bermuda Bay Pennant, and the background from the second card is the reverse side of the the Rich Razzleberry Pennant.


The Bohemian DSP coordinates with Bermuda Bay, Blackberry Bliss, Island Indigo, Delightful Dijon, Rich Razzleberry, and Very Vanilla. You can also purchase a pack of Bohemian Cardstock, which includes 8 sheets of each color: Bermuda Bay, Delightful Dijon, and Rich Razzleberry. I also used the new Banner Triple Punch to create the pennants. All of these new products will be available for purchase on June 2nd. 


Measurements:
Very Vanilla: Card base is 4-1/4 x 11 scored at 5-1/2"
                             Greeting is 2"
Rich Razzleberry: 4 x 5-1/4"
* I punched the 2" circle out of the middle of the mat.
Bermuda Bay: 2-1/2" square
Delightful Dijon: 2-1/2" square
DSP: Backgroud is 3-3/4 x 5"
            Pennants are 1 x 5"


Product List

5/28/15

Mixed Media Makeover

So my goal of posting once a week has yet to be met. I've been really busy this past month with the end of the school year stuff. However, I have taken some time to craft. May 15th - 17th I attended my monthly Scrapbooking Retreat. I participated in a challenge, and won 3rd place! The challenge was to alter this awful looking planner into some awesome! 


The ladies that put on this Scrapbook Retreat stated that they got these UGLY things from the $1.50 bins at Michaels, and believe it or not the inside of the planner is very nice. It has a grey and white chevron design, and there is a sturdy pocket for each month.  

I've been watching many Mixed Media Videos on YouTube lately, so I thought I take the opportunity to get my hands wet. First I put a lite coating of Gesso all over the planner. Then I used a variety of stencils (Tim Holtz & TCW) and modeling paste to add some texture. Next, I used different spray inks (Tattered Angles & Dylusions). After it was all dry, I went over the textured pieces with some antiqued gold Rub 'n Buff. I added some Prima Flowers and some metal pieces. The binding looked a little plain, so I added some black acrylic paint with my finger. Here is the finished product:


I'm really happy with how my first Mixed Media project turned out. I can't wait to do more!!!


5/2/15

Jax STARZ Hop - Dads & Grads

Welcome to May's installment of the the Jacksonville STARZ Hop. You may just be starting the blog hop or may have come from Beka's Blog. Either way welcome! You can follow the full blog hop lineup below to move along from blog to blog, so you can see all of the new projects. This month we are focusing on Dads and Grads. I chose to focus on the Grads because 1) I am a high school teacher, and 2) I have about 5 seniors that are graduating this year.

Here is the card I'm making for my seniors that are graduating this year. My school's colors are Black and Gold, so I used Basic Black and Crushed Curry. It's a very simple yet elegant, and I think my graduates will love it. I think I might add a diploma and 2015 to the base of the year. 


 It's a Spring Fold Card. Basically the fold of the card springs up the face of the card. Here is a template to help you recreate this card.


The dotted lines are where you score, and the solid lines are where you cut. Here is a picutre to show how the fold works. Once your are finished embellishing your card you glue the bottom triangle to the base. This helps the face of the card "spring" up. 


Well thanks for hopping by. Please be sure to leave a comment before you head on over to Rose Ann's Blog

Blog Roll:
Amanda Sevall
Amy Unick 
Beka Laing
Cari Verschueren - You Are Here!!!
Rose Ann Marr


Product List